Ultimate Guide to Designing and Printing Custom Stickers
Ever find yourself in a sticky situation when you're trying to print stickers? Here at Lightning prints, we got you covered with a variety of sticker print options that are highly customisable to your business needs. Choose from a variety of sizes, material types and shapes to make your stickers more eye-catching and memorable.
We often get asked about how to design and format design professional-looking stickers for printing. As experts, we’ve got the process down pat and we want to share some guidelines to help designers and business owners.
1. Free Design Resources for Sticker Printing
Designing a professional-looking sticker print is no easy task. Luckily, there are tons of pro-bono resources out there that can help you design and image your labels before sending them to the printer. This allows you to ideate and even develop finished designs to stick within your budget. You can also find a wide range of design templates available online that will allow you to design your own sticker print online for free. Here are some great resources:
- StickerGiant Templates - This is a huge selection of common sticker templates. From circles to squares to specialty templates.
- If you don’t have access to Adobe Creative Suite products, you can edit Photoshop files online using a tool called Photopea.
- L.Theme’s Circle Sticker Template - This is a pretty straightforward sticker template that has everything that you need for a good sticker design.

Source: Brandcrowd
2. Formatting Designs for Sticker Printing
A. Account for Bleed
“Bleed” is a term that describes the area in which your design touch the edge (die-cut) of the sticker print. This is important to consider when designing your artwork, to ensure you don’t have any white lines or borders around die-cut lines in the event of press machinery shifting during the die-cut process.
B. Account for Safety Margin
All elements of your sticker print must be within the blue Safety Margin of 3mm from all sides of the red die-cut line.
- If you wish to add borders to your design, make sure that they are either thick enough or placed well inside the blue Safety Margin line. We generally recommend against adding borders as slight cutting imperfections are to be expected.

C. Fit your design to the correct size format
Ensure that the sticker print files that you upload are compatible with the format size of the sticker that you wish to order.
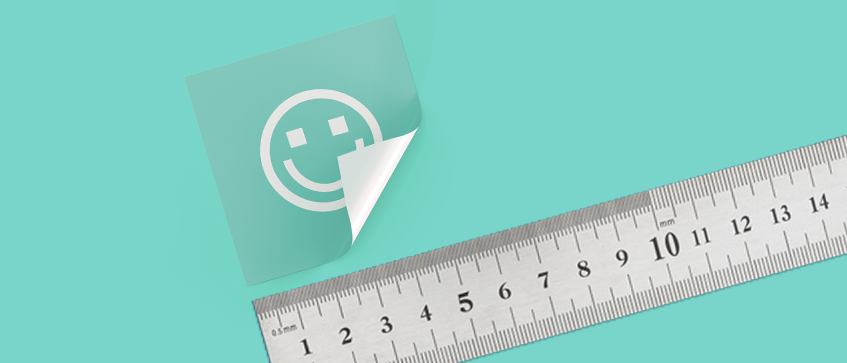
D. Use an image resolution of at least 300 DPI
To avoid blurriness, use only images and graphics that have a resolution of 300 DPI or more. Before sending your files, we recommend that you embed your images into the file.
E. Use CMYK colour mode
Files should be prepared in CMYK colour mode. Keep in mind that if the setup is wrong, colours on the finished product may differ.
F. Convert all texts to outlines or embed them in your file
To avoid issues with text when submitting your sticker print, make sure to convert them to outlines, or to embed them when saving to PDF.
- Texts should be at least 2mm in height or 12-14 points in size, to ensure that they will appear sharp on the sticker print.
3. Do's and Don'ts of Sticker Printing
Do's
1. Pick the correct sticker material
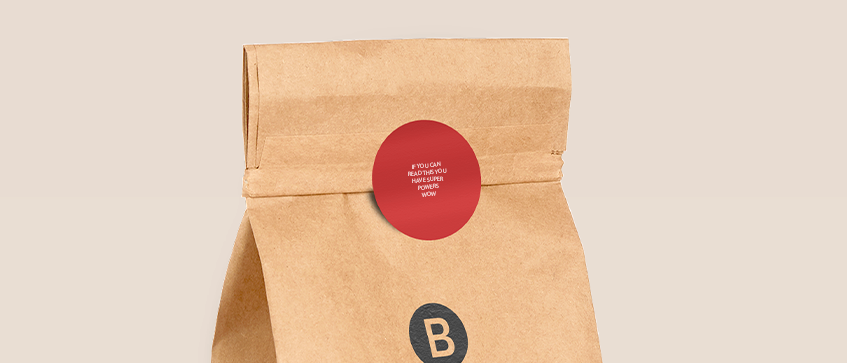
One of the most overlooked factors when printing stickers is the material used. It is important and professional to know what you are printing on as different materials come with different characteristics. For example, Kraft or Mirrorkote stickers are not waterproof and thus, they are not suitable for refrigerated products and Bath & Body products . Instead opt for a Waterproof Synthetic Sticker that comes with a either a gloss or matte laminate to further provide your stickers with an extra layer of protection from tears and smudges. Knowing more about these sticker materials can help you decide better when you plan to print your sticker.

2. Be careful of transparent sticker labels
Sometimes a transparent sticker print is the perfect way to create a striking look that emphasizes your packaging – and show off everything inside of it. However, one of the pitfalls is that they can show off every imperfection from the application process. Common issues like air bubbles and wrinkles are magnified on transparent, glossy films since there’s no color to hide them. As such, this makes them most suitable for solid, smooth surfaces (flat & curved) such as bottles, glass, sturdy boxes and windows.
Another way to avoid unsightly bubbles is to put a layer of white base behind the individual elements of your design to shield it from the packaging or its contents. This will offer more visibility, vibrancy and make any imperfection significantly less obvious. Opting for a matte laminate would also help in minimising any unwanted textures.

Don'ts
1. Print Illegible Words
One of the most common mistakes when it comes to printing is the legibility of text. As small as custom stickers can be, the text size cannot be smaller than 6 pt. This is especially important when conveying vital product information or food warning labels. Any smaller will result in a sticker with unclear words, which could mislead the consumer. This can be challenging when designing tiny stickers (size eg. 3x3cm), but do prioritise the readability of the text before anything else, text size matters!
2. Create your sticker with the wrong dimensions
It is as any other artwork that needs printing, your sticker canvas should be exactly as the size to be printed. This is because having the wrong size dimensions can skew your perspective of the artwork. Creating a 3x3cm sticker for example would mean you need to set your canvas as 3x3cm as well. To avoid printing ‘accidents’, you can never go wrong by setting your sticker dimensions as the size it should be. This can be done on design tools such as Photoshop, Illustrator and InDesign.
4. How to order stickers on Lightning Prints
Try out our easy-to-use upload feature which allow you to upload your custom stickers for your business or personal use. It's the fastest and easiest path to creating your sticker prints with us. Order from a range of sizes, material types and quantity!
Step 1:
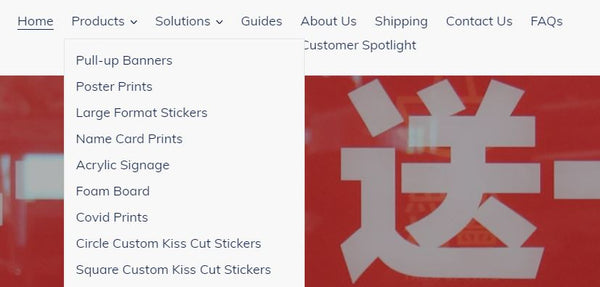
On the Lightning Prints website, go to the tab "Products". Choices available for our stickers are Square and Circle. Proceed to select either "Circle Custom Kiss-Cut Stickers" or "Square Custom Kiss-Cut Stickers" from the drop-down menu as shown in this image. For custom shapes and sizes, order your stickers via this Custom Order Form.
Step 2:
Proceed to upload your finished sticker print artwork by clicking on "Upload". Here, you can make additional edits to your design: you can crop it or change orientation our tool’s point-and-click interface.

Save your design by clicking the Save Icon on the right-hand side. You should see a preview of your uploaded artwork/design.

Step 3:
Select your size, choice of sticker material, laminate and desired quantity. For custom sizes and quantity, order your stickers via this Custom Order Form.
- Size
Lightning Prints is able to print square and round stickers with a diameter of up to 7 cm. Please click on "Size" and select the dimension which is equal to your diameter value in the drop-down options.
- Sticker Material
Please click on "Sticker Material" to choose your desired material. We currently offer 3 material types for stickers: Waterproof Synthetic Sticker (Matte), Waterproof Synthetic Sticker (Glossy) and Transparent Tear-proof Waterproof Sticker.
- Quantity
Please click on "Quantity" to choose your desired quantity. We currently print stickers in quantities of 100 to 400.

Step 4:
When you are ready to print, just add your finished work to cart by clicking on "Add To Cart" and you have officially placed an order with us!

Still unsure about how to format or print your stickers? Then the next step is to contact us at lightningprints@gmail.com or call us at 98267596.
With Lightning Prints, you can order stickers with many options of materials and sizing based on your sticker print needs.
If you don’t see the option you want to go for, don’t hesitate to contact us!