Cut-Bleed-Safety Margin Checklist That Every Print Job Needs
The number one concern about undergoing a printing project is your design not looking exactly how you envision it. If you’re not a design expert, there are some small but very important details that we tend to overlook. This include the bleed, cut, and safety margins. Knowing and understanding these specs will make your prints look their best!
While our state of the art equipment will deliver the best looking final product, there is still a small margin of error when cutting your materials. To eliminate this possibility, we recommend taking some steps on your end to achieve a perfect print job. For today's Lightning Prints blog, here’s an easy tutorial on setting up a bleed, cut and safety margin, so that your prints never look less than perfect again!
Cut Line
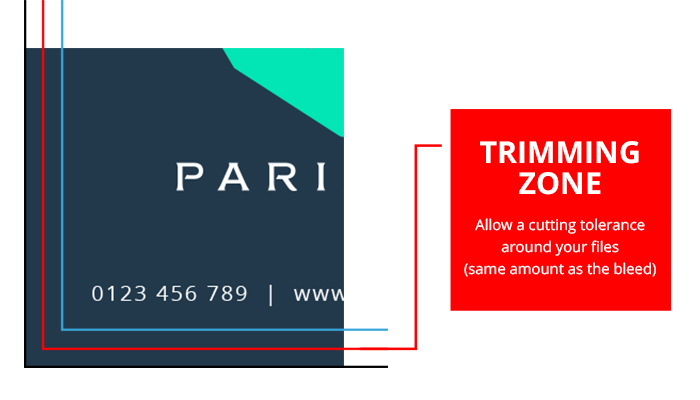
Let’s start with the cut lines. The cut line is a technical way to refer to the finished size of a product. For example, a standard 2” x 3.5” business card is also its cut size. This means in a layout file, the cut lines show you where the product will be cut down to its desired size.
Why does the trim size matter? As you upload your design, it’s useful to be aware of where your cut edges are so that you may extend your image further than the edge, in order to eliminate any margin or error that is bound to occur when your product gets trimmed.
To establish where, and how much of your image should go beyond the cut line, is everything that falls over into the bleed zone. The size in which your images should extend into both of these margins will be listed in the next section, the bleed zone.
Bleed Zone
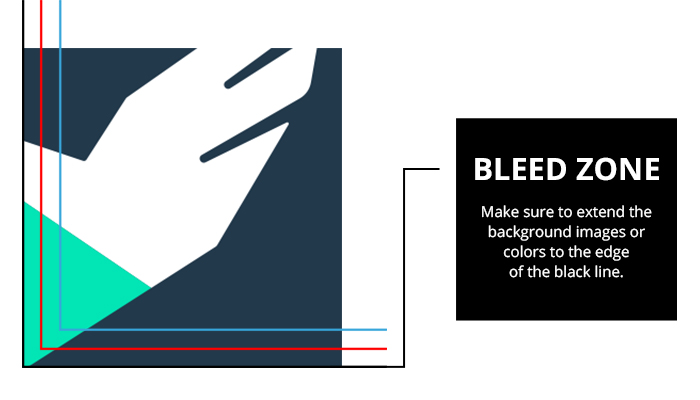
To make it simple, a bleed is the extra margin on print materials that is meant to be cut off when the product is cut to its final size. It literally means that the colour and graphics on a product will “bleed off the page” so that when your image reaches the edge, it won’t leave any unwanted white edges.
You can set your bleed in a layout file by extending past the trim line to where the blade will cut through. You may be asking yourself why you have to incorporate a bleed zone in the first place. Giving yourself a bleed zone will help eliminate the inevitable margin of error where the actual cut is made. If you don’t include a bleed, there will be a white border left on the edges.
To know the exact size to extend your artwork with a bleed zone depends on the product you’re printing. For example, custom stickers have a 3mm bleed, meaning 3cm x 3cm circle sticker will have a bleed size of 3.3 cm x 3.3 cm.
See the list below for the recommended bleed size for Lightning Prints'' products. These sizes should also apply for your cut size.
- 3mm bleed: Business cards, club flyers, brochures, postcards and custom stickers.
- 3.2 mm bleed: A-frame signs, banners, acrylic signage, posters, retractable pull-up banners, window/floor decals, wall stickers and foam board signs.
- 8mm bleed: Business cards and postcards with rounded corners.
Safe Zones
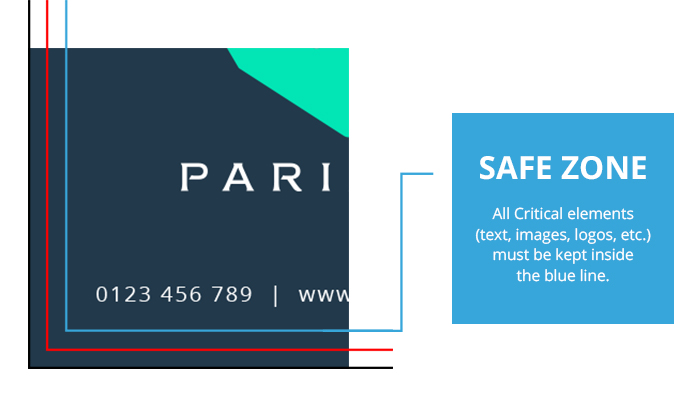
Now that we’ve covered the cut and bleed, the last step seems more apparent. The safe zone is the area where all the most important, critical elements (such as text, images, logos, etc) are placed. Making sure they are within the safe zone is the only way to avoid these elements from being cut off.
You must give plenty of room for your safe zone, because even the smallest deviation could result in an uneven finished job. The actual cut can happen anywhere between the bleeds and the safety margins, so it’s important to allow plenty of room for mechanical tolerances. It is often recommended by design experts to allow your artwork to have at least 5mm to 6mm around the edges of your product.
The diagram below shows you where to keep all of the critical elements you want to go into your print job.
Still need help? Give us a shout!
Our experienced production team is here to get your artwork in shape. For support or enquiries, call us at: 98267596 or email us at: ask.lightningprints@gmail.com or fill up this contact form here!
If you are unable to amended your artwork yourself, we have a design team here who would be happy provide you with artwork amendments at a small fee of $10 or certainly provide a quote to re-design the entire file if necessary.
We hoped this checklist has been helpful to you and do share it with anyone who needs it! Til' next time, cheers!


